


What is a Meta Robots Tag?
A meta robots tag, also referred to as a robots tag, is a type of HTML code that is inserted into the <head> section of a web page.
Its purpose is to provide instructions to search engines on how they should interact with a URL and whether or not to include it in their index.
This is what it looks like
<meta name="robots" content="noindex" />The meta robots tag is typically used to control the indexing behaviour of search engine bots.
It contains a "content" attribute that specifies various directives, such as "noindex", which tells search engines not to index the page.
The meta robots tag is specific to each individual page and allows website owners to have control over how search engines handle their content.
Why are meta robots tags used?
Meta robots tags allow you to control how Google and other search engines index your web page's content and whether they should follow links or archive its content.
Meta robots tags give you control over your website's indexability. This includes determining:
If the page should appear in search results
If links on the page should be followed
Requests to exclude images from being indexed
Not displaying cached results
Not showing a snippet of the page
Here are some examples of content that you may wish to prevent search engines from indexing:
Thin pages
Pages in the staging environment
Admin pages
Internal search results pages
Pay-per-click or PPC landing pages
Pages containing information about upcoming promotions, contests, or product launches
Robots meta tag attributes and directives
Two attributes need to be set for a robots meta tags - "name" and "content". Both of these attributes are required and are used to assign the values.
Here is the meta robots tag structure:
<meta name="robots" content="value">In this example, "name" specifies the type of instruction you want to provide - the value "robots", indicates that the metadata is related to instructions for web crawlers - and "content" specifies the actual instruction or value.
Name
The "name" attribute in the robots meta tag is used to specify instructions for crawlers - also called user agents - to follow. By setting the "name" attribute to "robots", you can provide instructions that apply to all crawlers.
Here's an example of using the "name" attribute with the "robots" value:
<meta name="robots" content="noindex">In this example, the "content" attribute is set to "noindex", which instructs crawlers not to index the page.
You can also use multiple meta robots tags with different "name" values to specify instructions for different crawlers. For instance:
<meta name="googlebot" content="nofollow"><meta name="googlebot-news" content="nosnippet">In this example, different instructions are provided for Googlebot and Googlebot News crawlers, using the "name" attribute with specific values.
Content
The "content" attribute is used to provide instructions to a specific user-agent specified in the "name" attribute.
It tells the crawler what actions to take about indexing and following links on the page.
Here are some common directives that you can use in the "content" attribute:
"index": This instructs the crawler to include the page in its index. If "noindex" is not specified, "index" is assumed as the default.
<meta name="robots" content="index">FYI: The User-Agent value "robots" applies to all crawlers. You can add multiple robots meta tags in the <head> section as needed. It is also important to note that the attributes for name and content are not case-sensitive.
"noindex": This instructs the crawler not to include the page in its index, which means the page won't be shown on search engine results pages.
<meta name="robots" content="noindex">"follow": This instructs the crawler to follow the links on the page to discover other pages.
<meta name="robots" content="follow">"nofollow": This instructs the crawler not to follow the links on the page, which means the links won't be crawled and indexed.
<meta name="robots" content="nofollow">"none": This is a shortcut to specify both "noindex" and "nofollow".
<meta name="robots" content="none">"all": This is a shortcut to specify both "index" and "follow".
<meta name="robots" content="all">"noimageindex": This instructs the crawler not to index the images on the page.
<meta name="robots" content="noimageindex">"noarchive": This instructs the crawler not to show a cached version of the page on SERPs.
<meta name="robots" content="noarchive">"nocache": This is the same as "noarchive", but only for MSN.
<meta name="msnbot" content="nocache">"nositelinkssearchbox": This instructs the crawler not to show a search box for your site on SERPs.
<meta name="robots" content="nositelinkssearchbox">"nopagereadaloud": This instructs the crawler not to allow voice services to read your page aloud.
<meta name="robots" content="nopagereadaloud">"notranslate": This instructs the crawler not to show translations of the page on SERPs.
<meta name="robots" content="notranslate">"unavailable_after": This allows you to specify a time after which the page should not be indexed.
<meta name="robots" content="unavailable_after: [date]">In September 2019, Google introduced a feature that enabled webmasters to utilize a collection of techniques that provide greater control over the preview content displayed for their web pages.
It includes the following meta tags:
"nosnippet": You can use the "nosnippet" to instruct search engines not to show any snippet for that particular page. This way, users won't see any preview or summary of the page's content in the search results.
<meta name="robots" content="nosnippet">"max-snippet": You can use the "max-snippet" to specify the maximum number of characters you want to allow in the snippet. For instance, if you set it to "max-snippet:150," search engines will only display up to 150 characters of the article's content as a snippet.
<meta name="robots" content="max-snippet:150">"max-video-preview": You can use the "max-video-preview" meta robots tag to specify the maximum duration of the video preview in seconds.
<meta name="robots" content="max-video-preview:30">"max-image-preview": If you have a web page with images, and you want to control the size of the image previews that appear in the SERPs, you can use the "max-image-preview" meta robots tag.
You can set it to "none" if you do not want any image previews to be shown, "standard" for regular-sized previews, or "large" for larger image previews.
This allows you to customize the display of image previews in the search results, depending on your preferences.
<meta name="robots" content="max-image-preview:large">It's important to refer to the documentation of different search engines to understand which directives are supported by them.
Google and Bing, for example, have their own supported directives, and you can find the full list of directives in their respective documentation.
How to set up the robots meta tag?
Now that you have learned how and what different directives look like, you can create your own and implement them on your web pages.
Here are the general steps to set it up:
Open the HTML file of the webpage to which you want to add the robots meta tag.
Find the <head> section of the HTML file.
Add this code inside the <head> section: <meta name="robots" content="VALUE">
Replace VALUE with the desired instructions for search engine bots and specify the instructions for specific bots in the “name” tag. If you want to apply instructions for all search engine crawlers, use “robots”.
Save the HTML file.
Upload the updated HTML file to your website's server.
Test the robots meta tag to ensure it's correctly implemented.
Using Yoast
If you are using the Yoast SEO plugin, here's how to set up the robots meta tag:
Install and activate the Yoast SEO plugin.
Go to the post or page editor where you want to add the robots meta tag.
Scroll down to the Yoast SEO meta box, which is usually located below the content editor.
Click on the "Advanced" tab within the Yoast SEO meta box.
Look for the "Meta Robots Index" and "Meta Robots Follow" options, which allow you to set the desired instructions.
Choose the appropriate options from the drop-down menus. For example, you can select "noindex" to prevent indexing, and "nofollow" to prevent following the links on that page.
Save or update the post or page to apply the changes.
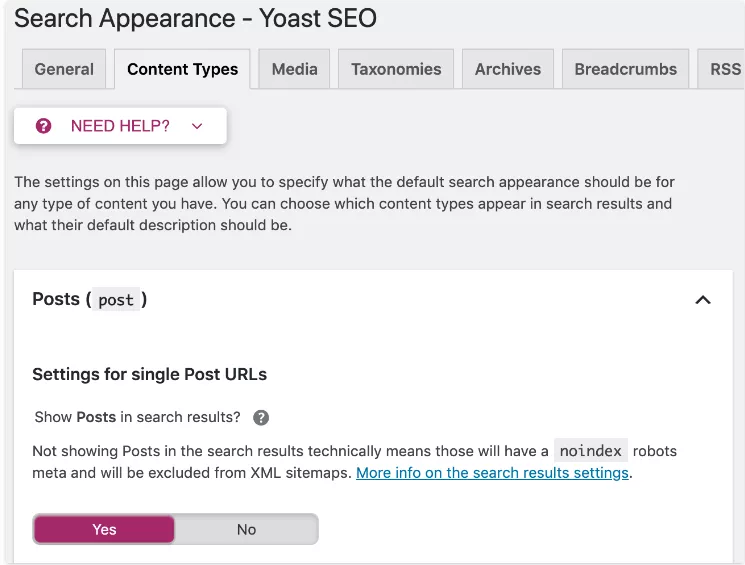
You can also apply these instructions to your entire website. Simply navigate to the "Search Appearance" section in the Yoast menu, where you can set up meta robots tags for all posts, pages, or specific taxonomies and archives.
What is X-Robots Tag?
The robots meta tag is commonly used to indicate whether or not a webpage should be indexed by adding a "noindex" directive.
However, this tag only works for HTML pages and may not be suitable for preventing the indexing of other types of files, such as images or PDFs.
This is where the x-robots-tags come into play. X-Robots-Tag is an HTTP header that is sent from a web server, and it can be used to control how search engines should treat certain files.
Unlike the robots meta tag, which is placed in the HTML of a page, the x-robots-tags are sent as headers in the HTTP response from the server.
An example of an x-robots-tag might look like this:
X-Robots-Tag: noindex, nofollow, noimageindexTo implement the x-robots-tag, you'll need to be able to access the .htaccess, or server configuration file of your website.
When to use the x‑robots-tag?
The x-robots-tag can be used to control indexing and crawling for the entire page, as well as specific elements within the page.
It provides flexibility in specifying directives for different file types and can be used to manage the crawling and indexing of non-HTML files effectively.
The x-robots tag offers more flexibility and functionality than the meta robots tag.
It allows you to use regular expressions (a way to find patterns in text), apply crawl directives to non-HTML files (like images or PDFs), and set parameters that apply to the whole website.
This means that the "x-robots-tag" can be a more powerful tool for controlling how search engines interact with your website.
How to set up the x-robots-tag?
Here is how you can set up the x-robots-tag on different servers:
Apache web server (using .htaccess file)
You can add the following code to your .htaccess file to set the X-Robots-Tag header for specific file types or directories:
<FilesMatch "\.(pdf|jpg|png)$">

    Header set X-Robots-Tag "noindex, nofollow"

</FilesMatch>
<Directory "/private/">
Header set X-Robots-Tag "noindex, nofollow"
</Directory>In this example, any PDF, JPG, or PNG files will have the X-Robots-Tag header set to "noindex, nofollow", which instructs search engines not to index or follow these files.
Similarly, any files or directories within the "/private/" directory will have the X-Robots-Tag header set to "noindex, nofollow".
Nginx web server (using nginx.conf file)
You can add the following code to your nginx.conf file to set the X-Robots-Tag header for specific file types or locations:
location ~* \.(pdf|jpg|png)$ {

    add_header X-Robots-Tag "noindex, nofollow";

}

location /private/ {

    add_header X-Robots-Tag "noindex, nofollow";

}
This code sets the X-Robots-Tag header to "noindex, nofollow" for any PDF, JPG, or PNG files, as well as any files or directories within the "/private/" location.
Note: It's important to understand the implications of using the X-Robots-Tag header and to configure it carefully according to your specific requirements. The examples provided are just basic examples and you may need to customize them based on your specific use case and server configuration.
Search engines and their supporting robots meta tags
Search Engine | Index | Noindex | Follow | Nofollow | Noarchive | Nosnippet | Notranslate | Noimageindex | None | All |
|---|---|---|---|---|---|---|---|---|---|---|
Yes | Yes | Yes | Yes | Yes | Yes | Yes | Yes | Yes | Yes | |
Bing | Yes | Yes | Yes | Yes | Yes | Yes | No | No | Yes | Yes |
Yahoo Search | Yes | Yes | Yes | Yes | Yes | Yes | No | No | Yes | Yes |
DuckDuckGo | Yes | Yes | Yes | Yes | Yes | Yes | No | No | Yes | Yes |
Baidu | Yes | Yes | Yes | Yes | Yes | Yes | No | No | No | No |
Yandex | Yes | Yes | Yes | Yes | Yes | Yes | No | No | Yes | Yes |
Common mistakes to avoid
It is very common to make mistakes when instructing search engines, with the most common being:
Meta robots directives on a page blocked by robots.txt
If a page is blocked in your robots.txt, search engine bots won't be able to crawl it and obey any meta robots or x-robots-tag directives.
Ensure that such pages can be crawled. If a page hasn't been indexed yet, a robots.txt disallow rule should suffice to prevent it from showing in search results, but adding a meta robots tag is still recommended.
Adding robots directives to the robots.txt file
Previously, although not officially supported by Google, it was possible to include a noindex directive in your website's robots.txt file to prevent indexing.
However, Google confirmed in 2019 that this approach is no longer effective.
Removing pages with a noindex directive from sitemaps
When attempting to remove a page from search engine indexing using a noindex directive, it's recommended to keep the page in your website's sitemap until it has been successfully deindexed.
Removing the page from the sitemap before it has been deindexed may cause delays in the deindexing process.
Accidentally blocking search engines from crawling an entire site
Unfortunately, sometimes robots directives meant for staging environments are unintentionally left in place when a website goes live, leading to negative consequences.
Therefore, it's crucial to thoroughly review and verify the correctness of any robots directives before migrating a site from a staging platform to a live environment.
Final thoughts
Meta Robots Tag and X-Robots-Tag are essential tools for webmasters to control how search engines crawl, index, and display their website's content.
Meta Robots Tags are HTML code snippets inserted in the head section of web pages, while X-Robots-Tags are HTTP headers that can be applied to non-HTML files.
By understanding the proper use and implementation of these tags, webmasters can prevent unwanted indexing and improve their website's performance.