


What are Header Tags?
Header tags are HTML elements used to define headings and subheadings within a webpage's content.
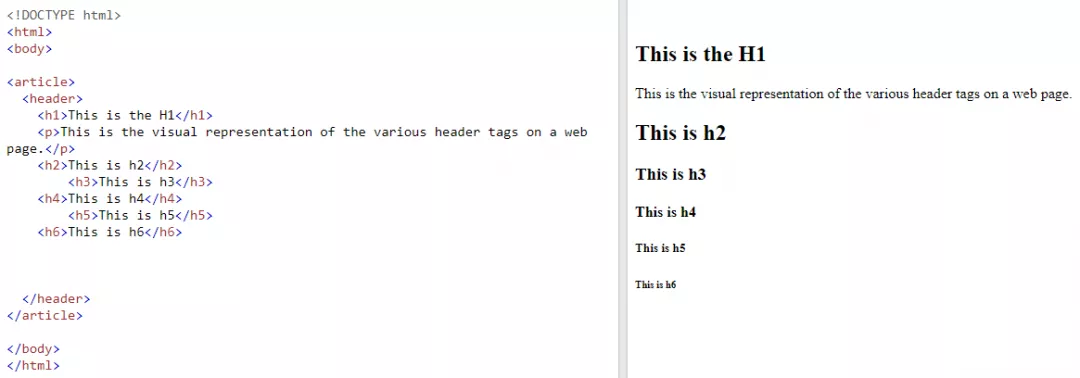
The purpose of HTML header tags (H1, H2, etc.) is to distinguish headings and subheadings from the rest of the page content. The H1 is used for the primary page title, while H2 through H6 tags serve for progressively less important subsections.
Implementing proper header tags enables clear separation between different levels of topics and supporting details on a website.
Example of header tags in an HTML code
For your understanding, here is an example of header tags used in a blog post:
<!DOCTYPE html>

<html>

<head>

<title>10 Essential SEO Best Practices for 2023</title>

</head>

<body>

<header>

<h1>10 Essential SEO Best Practices for 2023</h1>

</header>

<main>

<article>

<header>

<h2>1. Conduct Keyword Research</h2>

</header>

<section>

<header>

<h3>1.1. Use Keyword Research Tools</h3>

</header>

<p>Paragraph about using keyword research tools.</p>

<header>

<h3>1.2. Analyze Search Intent</h3>

</header>

<p>Paragraph about analyzing search intent.</p>

</section>

<header>

<h2>2. Optimize On-Page SEO</h2>

</header>

<section>

<header>

<h3>2.1. Create High-Quality Content</h3>

</header>

<p>Paragraph about creating high-quality content.</p>

<header>

<h3>2.2. Optimize Title Tags and Meta Descriptions</h3>

</header>

<p>Paragraph about optimizing title tags and meta descriptions.</p>

<header>

<h3>2.3. Use Header Tags Strategically</h3>

</header>

<p>Paragraph about using header tags strategically.</p>

</section>

<header>

<h2>3. Improve Website Performance</h2>

</header>

<section>

<header>

<h3>3.1. Optimize Page Load Speed</h3>

</header>

<p>Paragraph about optimizing page load speed.</p>

<header>

<h3>3.2. Implement Responsive Design</h3>

</header>

<p>Paragraph about implementing responsive design.</p>

</section>

<!-- Additional H2 and H3 tags would follow for the remaining best practices -->

</article>

</main>

</body>

</html>
As you can see, the main title of a blog post is marked with an H1 while the H2 tags are used for subheadings.
H3 tags are then used to highlight the subsections within each H2.
Why are they important?
These tags serve different purposes:
Clear hierarchical structure
Every time you read a piece of content, you scan through it via its headings. It gives you a rough idea of what the content is about.
These header tags logically divide up and arrange the content. Thus makes it clear to search engines what the main focus of the page is.
This way it can lead to the content being better recognized and indexed by search engines when people look for related searches.
Improved relevance in search results
When you add header tags strategically in website content, you focus more on using important keywords related to a particular query. As Google gives too much value to those headings, it determines whether the page is relevant to the searcher's query.
You may improve your chances of appearing in SERPs by using relevant keywords in the header tags that users are searching for.
Enhanced user experience
When you format content into logical parts and sub-parts using headers, the information becomes simpler to consume for people and search engine bots.
This can lead to higher involvement, lower bounce rate, and better SEO performance.
Historical usage
In the early days of HTML, the <header> element was initially used for headings. As HTML evolved, the <header> tag was replaced by <h1> through <h6> tags. It was introduced to represent different levels of headings and subheadings to provide more structure and hierarchy to web pages.
The <h1> tag is the most important heading, while <h6> is the least important. This change allowed for better organization and improved readability of web content.
In HTML5, the <header> tag was reintroduced as a semantic element to represent the header section of a web page or a specific section within the content.
This header section typically includes elements such as the site logo, navigation menus, introductory content, or authorship information.
The usage of the <header> element, along with other semantic elements introduced in HTML5 (<nav>, <article>, <aside>, and <footer>) contributes to creating a more meaningful and accessible structure for web content.
H1 vs title
The H1 header and title tag have distinct roles for a web page, but both are valuable.
H1 Header:
Visible on the page itself
Typically the first header
Placed in the HTML body section
Can be styled with CSS
Title Tag:
Defines the page title but is not displayed on the actual page
Appears in search results and browser tab
Placed in HTML head section
Important for SEO so search engines can determine the page's topic
By default, they may be identical initially. However, keeping them different improves the clarity and structure for users and search engines.
How many header tags are supported by HTML?
HTML has six header options: H1, H2, H3, H4, H5 and H6. There are no headers beyond H6 supported.
Most pages would not need to go past H4 subheadings. If you need to use H5 and H6 tags, it likely means too much information is being squeezed onto one page.
Instead of overloading a page, consider breaking the content into a separate, additional page. This helps improve readability and simplifies the structure for readers.
Are header tags a ranking factor?
We know that well-structured header tags enable search engines to accurately gauge the context of your content, which can lead to higher relevance.
It may lead to improved rankings because of good user experience but is not directly linked to it. As John Mueller clarifies this in a video:
…so these heading tags in HTML help us to understand the structure of the page but it’s not that you have any kind of a fantastic ranking bonus by having text in an h2 tag…. it’s not the case that you would automatically rank one or two spots higher just by using a heading so I’d recommend using it to give a semantic structure to the page but I wouldn’t say that this is a requirement for ranking properly in search.
What’s Google’s take on multiple H1s?
It is perfectly fine to use multiple H1s as Google doesn't have an issue with this practice. However, it's generally recommended to stick to one H1 tag per page for optimal SEO and better content organization.
Matt Cutts clarifies why using too many H1s can make your content look messed up but using it in moderation and in a logical way is fine.
How to add header tags in HTML?
Adding header tags in HTML is simple. You can use the <h1> to <h6> tags to define headings and subheadings in your content.
Here's how to add header tags in HTML:
Open your HTML file in a text editor or an Integrated Development Environment (IDE) like Visual Studio Code, Sublime Text, or Atom.
Locate the section of the content where you want to add the header.
Use the appropriate header tag, depending on the importance or hierarchy of the heading. For example, if you want to add a main heading, use the <h1> tag.
Here's an example of how to add header tags in HTML:
<!DOCTYPE html>

<html lang="en">

<head>

  <meta charset="UTF-8">

  <meta name="viewport" content="width=device-width, initial-scale=1.0">

  <title>Adding Header Tags in HTML</title>

</head>

<body>

  <h1>Main Heading (H1)</h1>

  <h2>Subheading (H2)</h2>

  <h3>Sub-subheading (H3)</h3>

  <h4>Additional Subheading (H4)</h4>

  <h5>Further Subheading (H5)</h5>

  <h6>Least Important Subheading (H6)</h6>

</body>

</html>
In this example, the main heading is enclosed within <h1> tags, and subheadings are enclosed within <h2> to <h6>, depending on their hierarchy.
Save the HTML file, and when you open it in a web browser, you will see the headings and subheadings displayed with different font sizes and weights.
Using WordPress
Adding heading tags in WordPress is a straightforward process that can be achieved using two methods: keyboard shortcuts and the drop-down menu within the editor.
For those who prefer using keyboard shortcuts, the process is slightly different depending on whether you're using a Mac or a PC.
On a Mac:
Press CTRL + ALT + 2/3/4/5/6 to apply the corresponding heading tag (for example, <h2>, <h3>, and so on).
On a PC:
Press SHIFT + ALT + 2/3/4/5/6 to apply the appropriate heading tag (such as <h2>, <h3>, etc.).
Alternatively, you can use the drop-down menu available in the WordPress editor to apply heading tags.
First, select the text you want to assign a heading tag to, then click on the drop-down menu (usually labelled "Paragraph" by default) located in the toolbar.
From there, choose the appropriate heading level (H2, H3, H4, H5, or H6) to apply to the selected text.
Using Wix
To modify heading tags on your Wix website, follow these steps:
Log in to your Wix account and open the website editor.
Navigate to the page where you want to add or edit heading tags.
Click on the text element containing the words or phrases you'd like to modify.
Highlight the text you want to assign a heading tag.
Click on the "Themes" drop-down menu, typically located in the toolbar at the top of the editor.
Choose the appropriate heading level from the available options.
If you're unsure about editing the code or encounter issues with multiple H1 tags, consider reaching out to your theme developer for assistance.
Best practices
Following are the best practices you can opt for to make better use of the header tags.
Add keywords to header tags
Incorporating keywords into your header tags is essential, as Google uses these tags to understand the context.
Keep in mind that it is crucial to always maintain a balance between human readers and optimizing for search engines.
If you optimize header tags without disturbing the flow and quality, it will help both the visitors and your website ranking.
Optimize for featured snippets
You need to optimize header tags well to be displayed as a featured snippet.
FYI: Featured snippets are brief, informative responses that appear at the top of Google's search results, offering users quick and relevant information.
Create a logical structure for your header tags. The H1 must have your main keyword, while H2 and H3 must have relevant topics. Spilt the content in a way that is readable and visitors can easily relate one section to another.
The goal is to use a logical hierarchy so that search engines can identify and feature the most helpful part of the content for searchers.
Keep headers short
Everyone wants to keep visitors on their sites for a long time. So they make a mistake by writing long articles without proper formatting. It distracts the visitors and they leave the site without exploring it.
As it can affect your website ranking by increasing the bounce rate, you must focus on providing quality. For that keep your content concise and provide short and to-the-point headers.
Headers should be between 3-5 words so they are easy to read and understand for people and search engines. Headers act as visual markers, dividing up long blocks of text into organized sections.
When headers are too wordy, they disrupt the flow and appearance of the page.
Keep design consistent in CSS
Using CSS to create consistent header styling is crucial for establishing a visual and user-friendly hierarchy.
By default, HTML makes H1 and H2 header tags larger and bolder and H3, and H4 tags smaller. However, some website themes may not follow this default size contrast which can confuse users.
To fix this, adjustments can be made in the CSS stylesheet to set up a reliable header style with proper font formatting code.
Or, custom CSS selectors can be added to apply extra styling rules just to the headers.
What should you avoid?
You must avoid certain bad practices while working with headers. Some of them are listed below:
Keyword stuffing
Stuffing too many keywords into heading tags can make your content look artificial. It will ruin all your SEO efforts.
Add relevant keywords naturally into headers in a way that flows well.
Hidden text
Avoid using heading tags to hide text, as this can result in penalties from search engines. It is considered deceptive and will definitely affect your site's rankings.
Repeating headings
Make sure every page on your website has its own distinct header tags. This tells search engines that each page covers new topics and ideas.
Do not duplicate the H1 tags to match the meta title tags word-for-word, as this creates repetition.
Styling purposes
Header tags should organize content, not decorate the text. CSS is better suited for formatting visual attributes like colour, sizes, and fonts of text including headers.
This separation of structure and presentation keeps sites accessible and maintainable.
The bottom line
Crafting clear, engaging headers makes your content more skimmable and entices readers to keep going.
Additionally, well-optimized headers can help you rank higher in search engines and may get your page shown as a featured snippet.