


Google’s Indexing API lets you inform Google when you add, update, or remove your website pages or URLs. This helps Google to schedule your website for a fresh crawl and keep the content updated in search results.
This feature is helpful, especially for sites with time-sensitive topics, a new website or the one with a complex structure and having a lot of pages.
In this guide, you will learn how you can use Google Indexing API to quickly crawl your website pages without having to wait for a long time.
Caution: We recommend you proceed at your own risk as Google recommends using this feature only for job posting and live streaming websites. Also, keep in mind that this process does not guarantee indexing. It may take a few hours to several weeks for content to show up in search results or it may not show up at all.
Steps to Get Your Website Crawled by Using Google Indexing API
Here are the steps to use Google Indexing API to get your pages crawled immediately:
Step 1: Download the SEOwallet Chrome Extension
You are first required to download and install the SEOwallet Chrome Extension to get started.
If you want to download it, click here.
After installing the extension, you will be required to access the Google Indexing API feature of IndexAPI Connector.
Step 2: Create an Indexing API Project
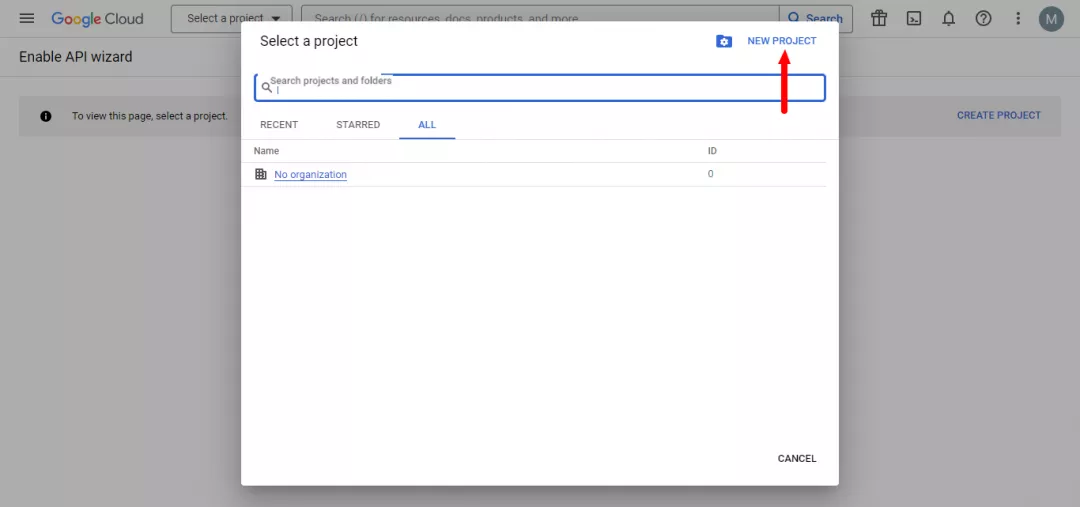
In the next step, create an Indexing API project by directly going to the Google Cloud Platform and clicking on “Create Project”.

As another option, you can click the “Select a project” option at the top and then choose the “New Project” option from the pop-up menu.
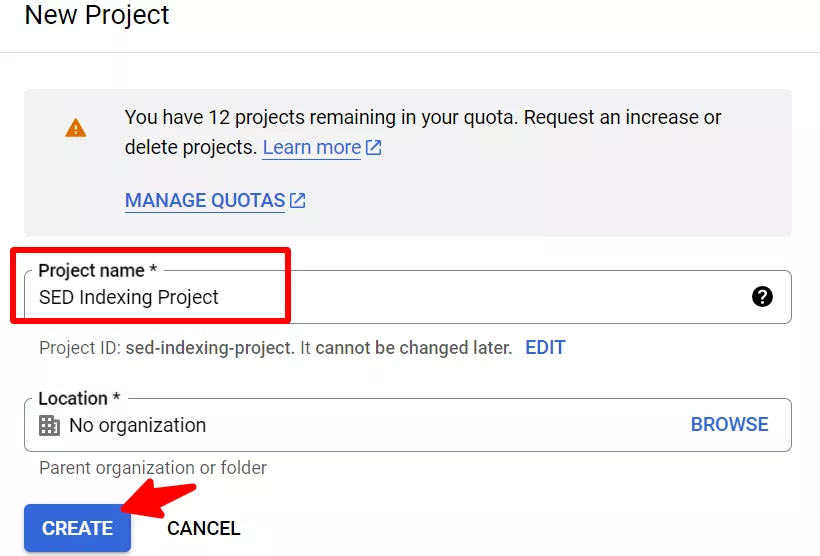
Name your project and then click the “Create” button.
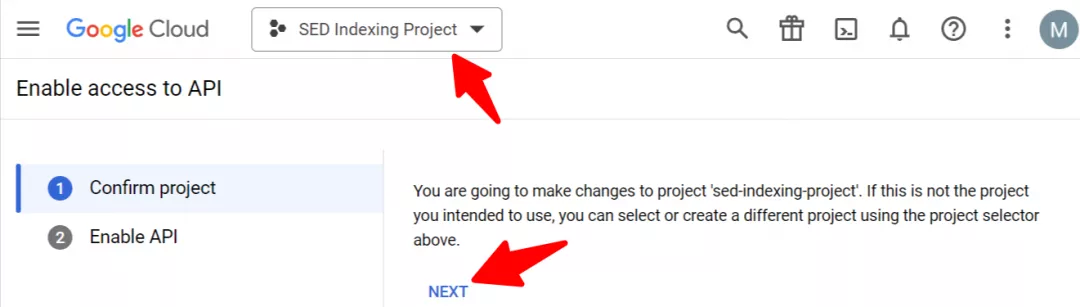
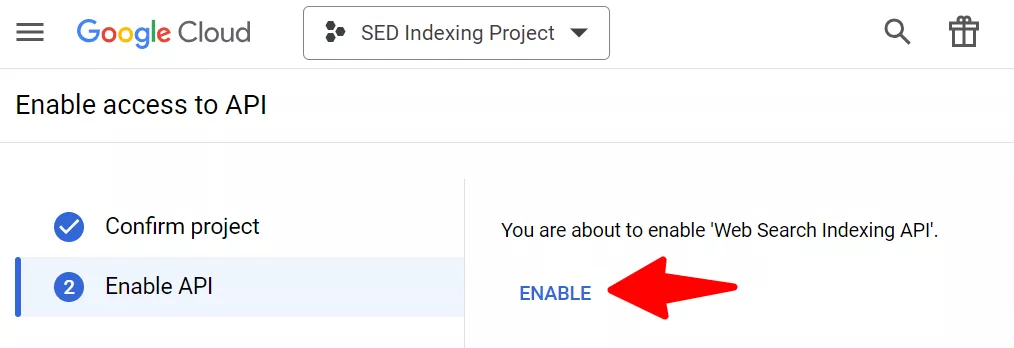
After this step, you will see the below screen. Here you need to select your preferred project which in our case is the “SED Indexing Project” and click on “Next”.
In this step, click on the “Enable” button to access the Indexing API.
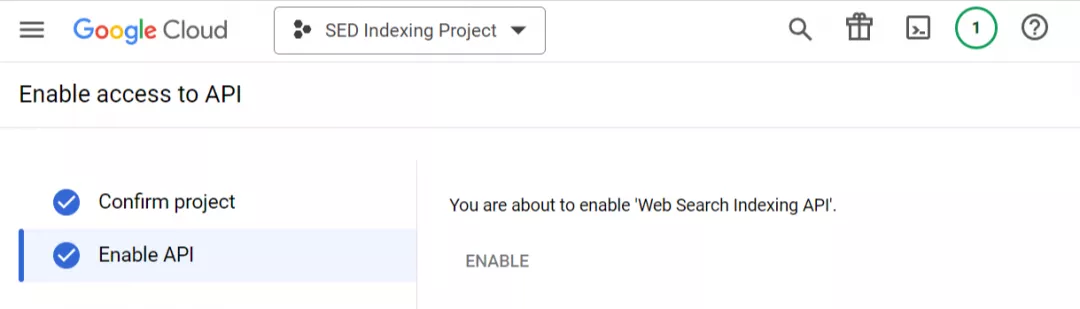
Once you are done with this step and enable the API, you can now close this window.
This is how it appears.
Step 3: Create a Service Account
In the next step, you are required to create a service account by going to this page. Select the project you want to proceed with.
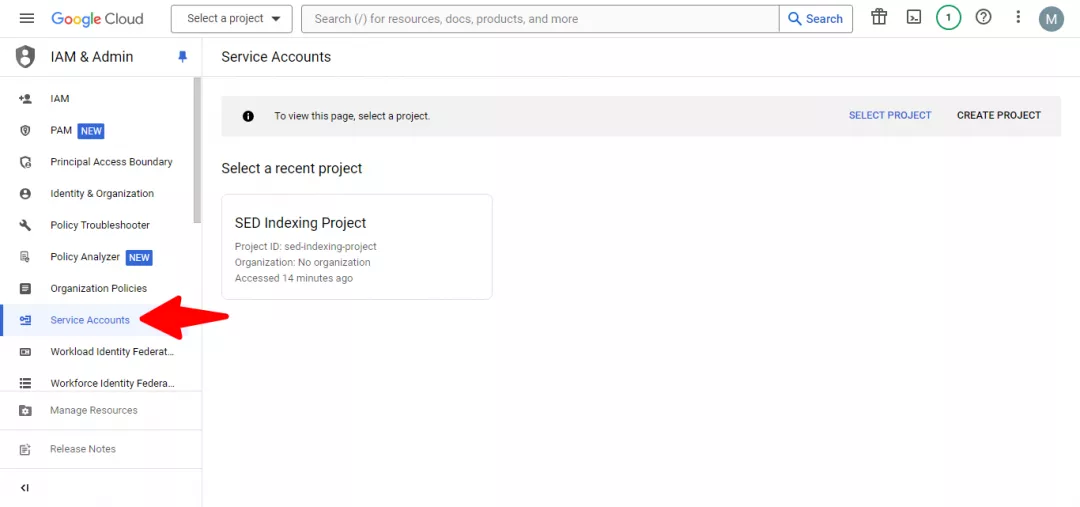
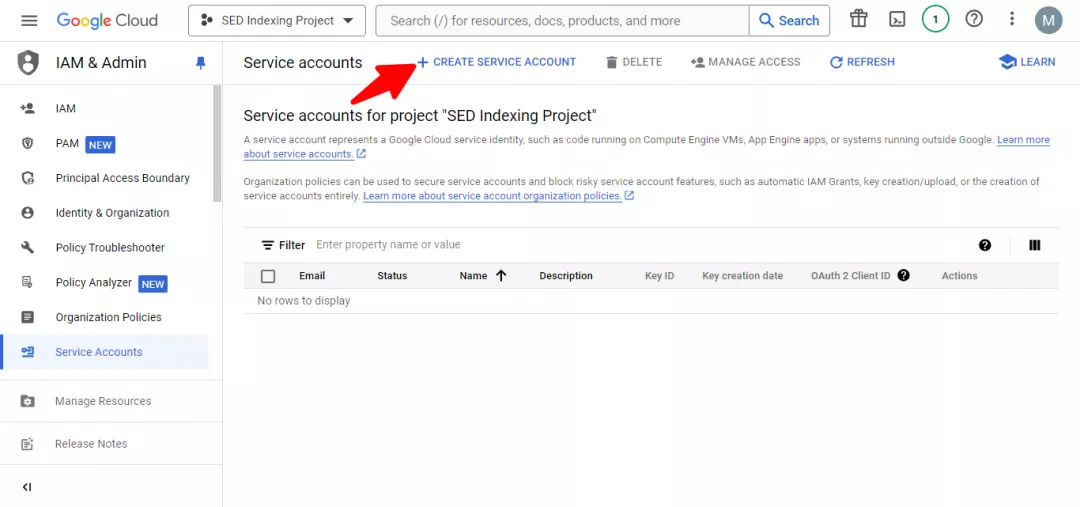
After selecting the project, you will see the below page. Click on the “Create Service Account” option.
Add the service name and account description.
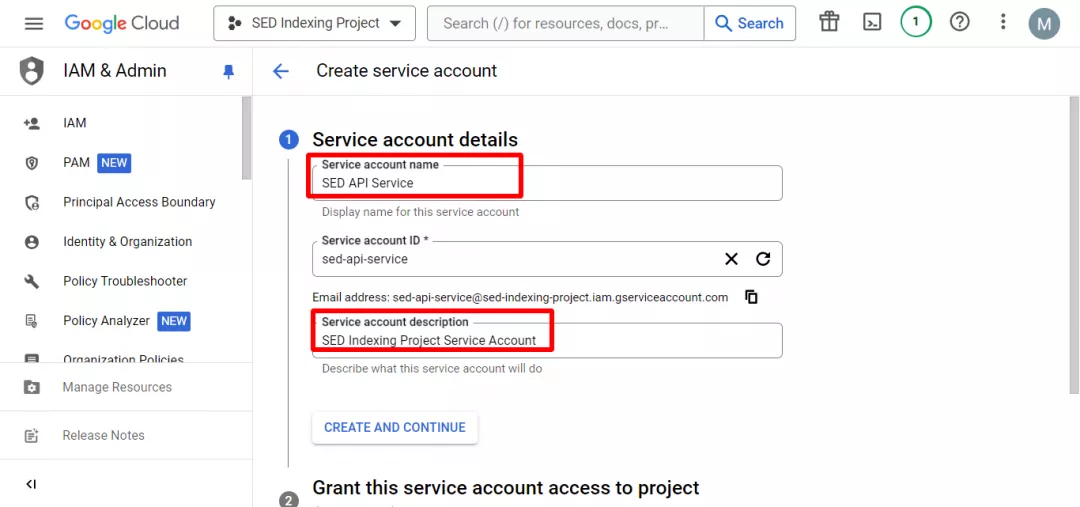
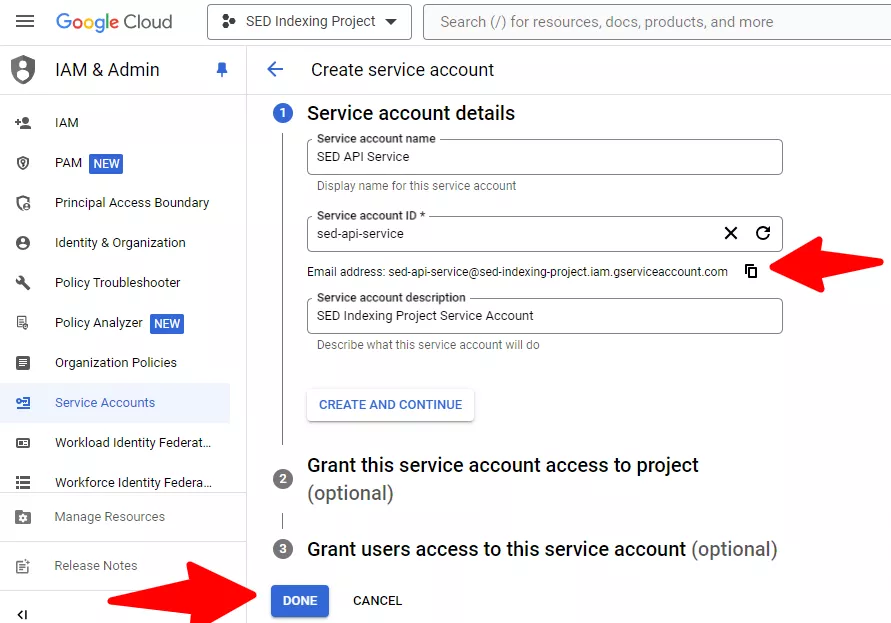
Copy the entire “Service Account ID” by clicking the copy icon in front of it (you’ll be needing that later) and then click “Done”.
Now you have your account ready.
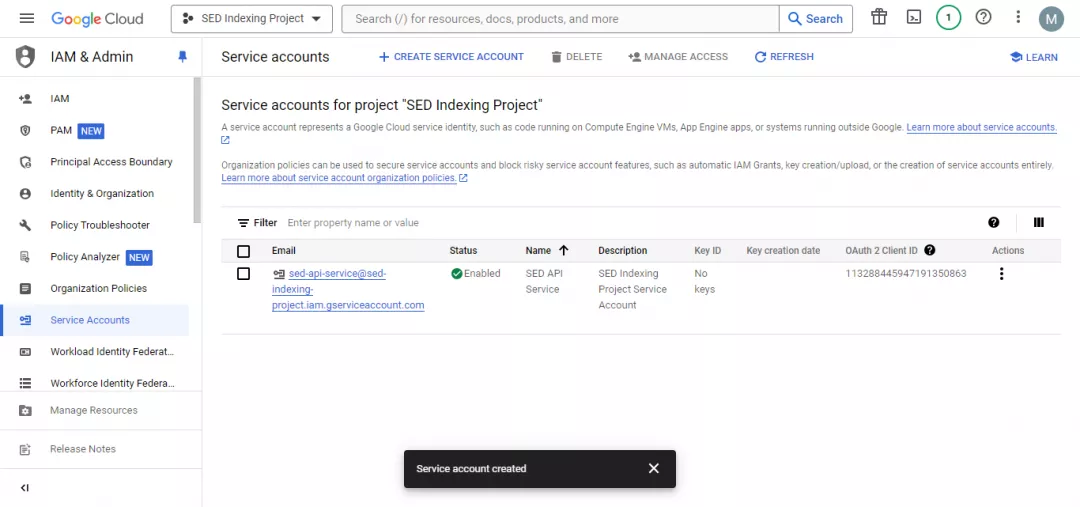
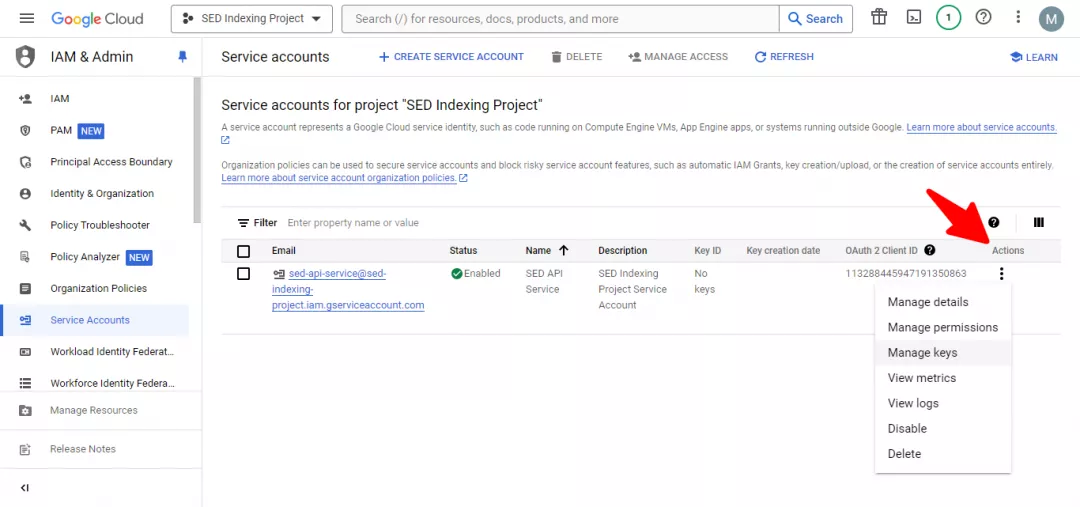
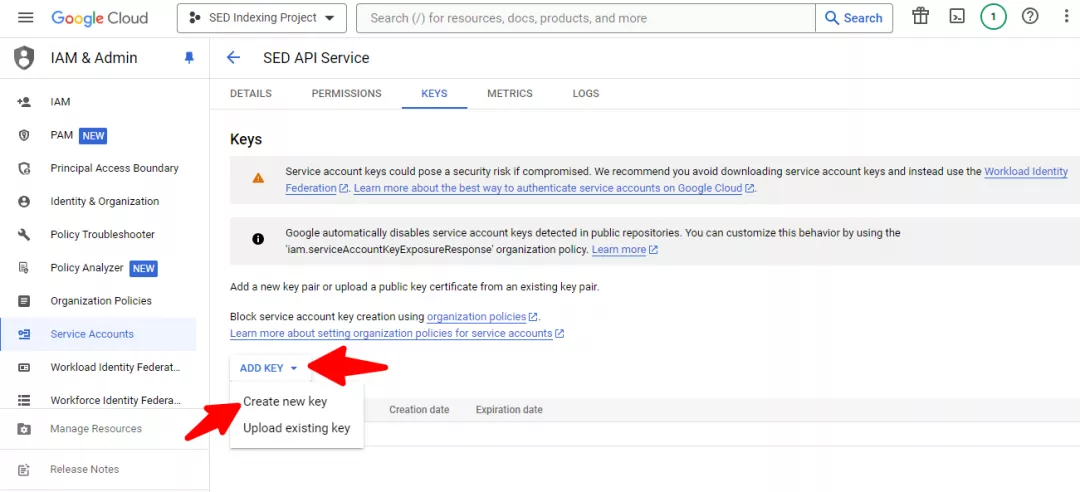
The next thing you need to do is download the file that has the API key. For that, click on the three dots under the “Actions” section and select “Manage Keys”.
On the next page, you will see the option “Add Key”. Click it and then “Create New Key”.
Choose the “JSON” option on the pop-up screen and then click “Create”.
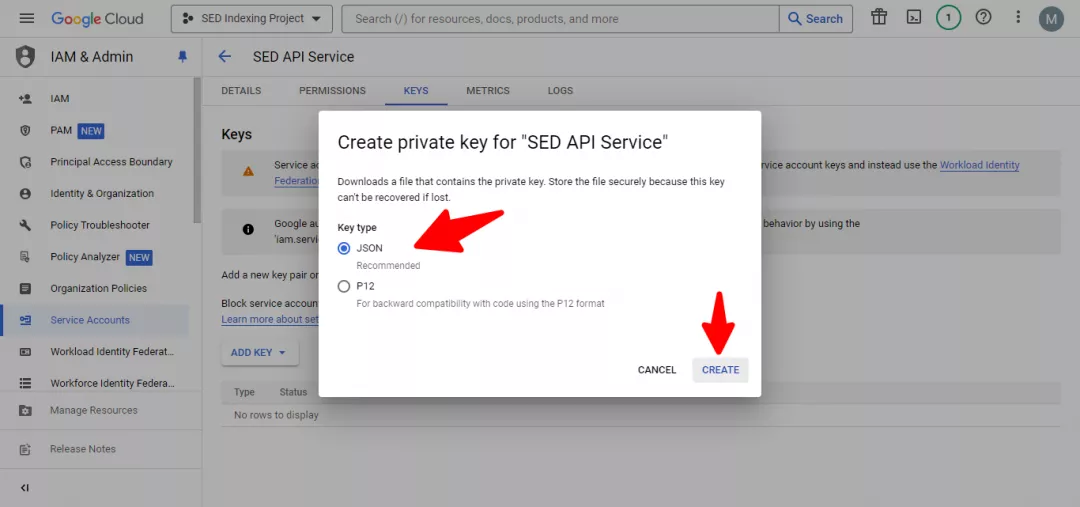
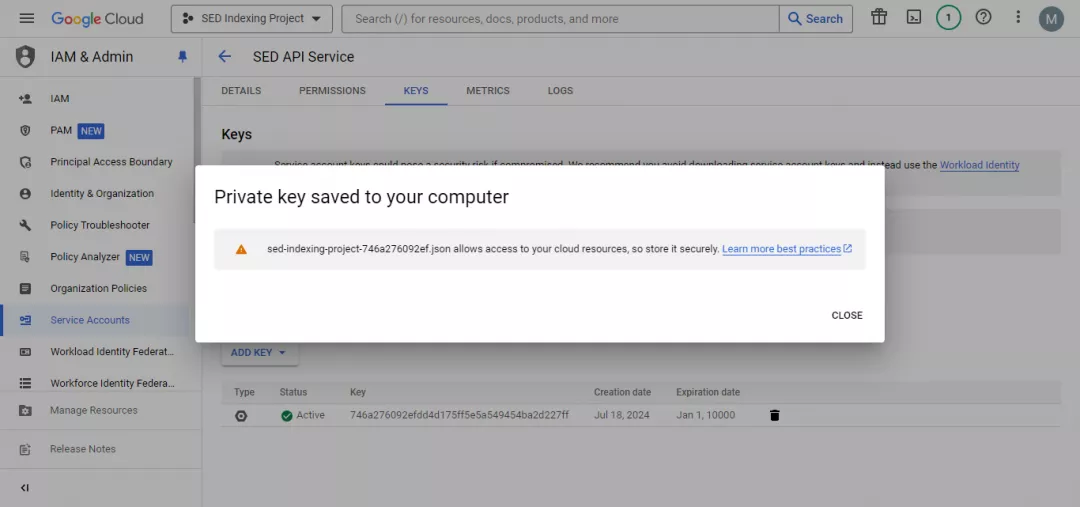
Once you click on the “Create” option, the file will be downloaded to your computer.
Step 4: Add the Service Account to GSC
The next step is to add your service account to your Google Search Console account property to proceed with the rest of the steps.
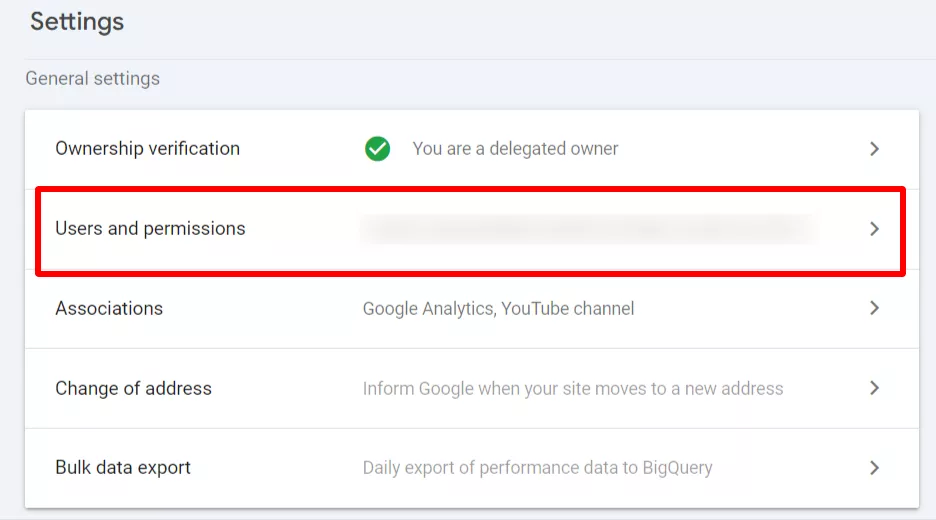
Go to your GSC account. Click on “Settings”.
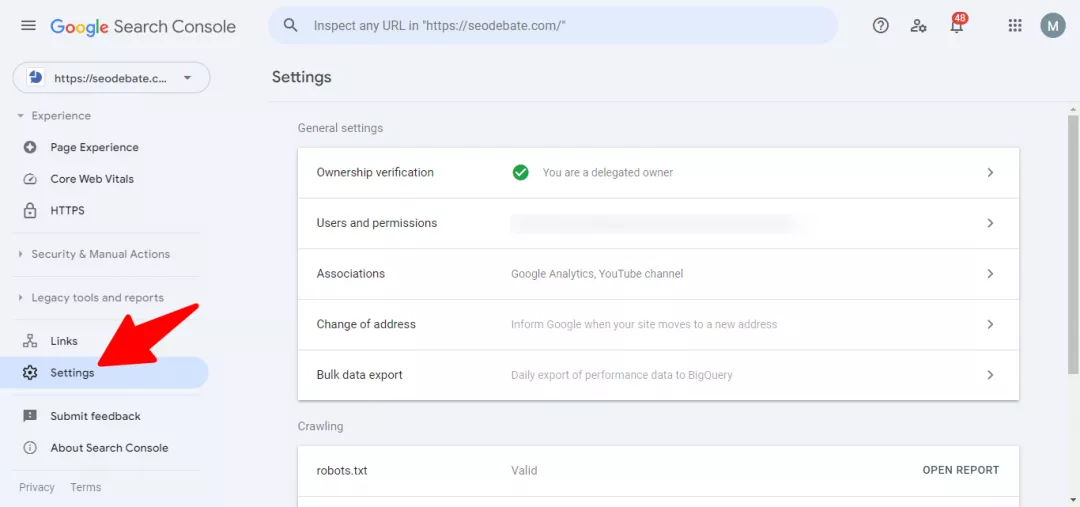
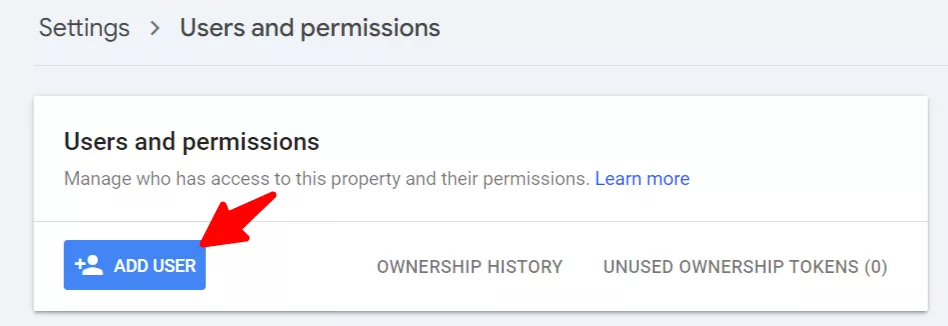
Now go to the “Users and permissions” and click on “Add User”.
Note: If you have multiple sites, you can use the same service account and JSON API key across all of them. Just make sure to give owner-level permission to this service account in the GSC account for all websites.
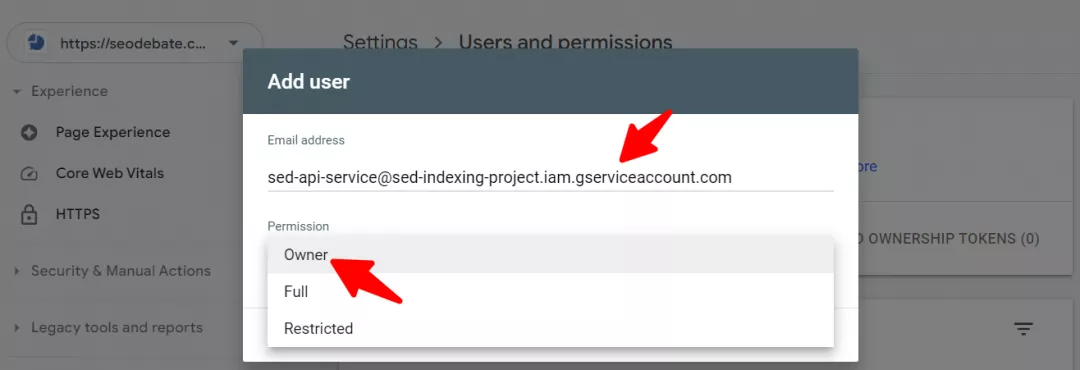
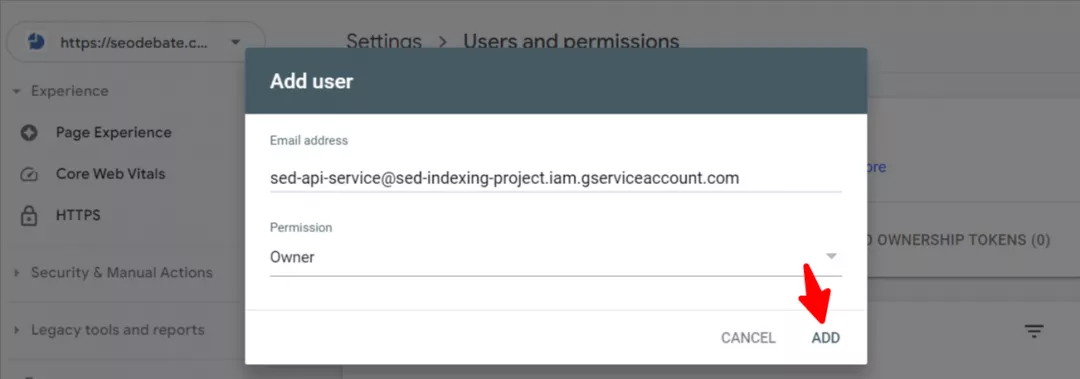
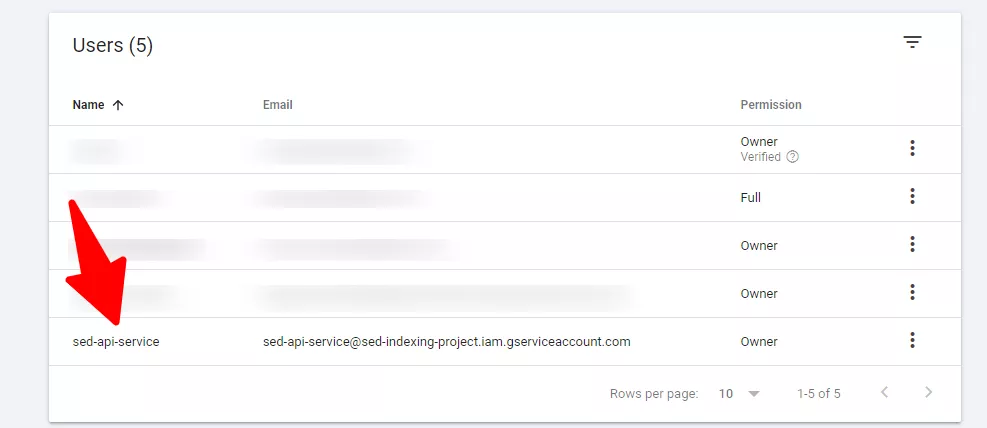
You will see an overlay. Add the “Service Account ID” you copied in Step 3 and select the “Owner” option in the “Permission” field.
Now click the “Add” button.
Now you will see your service account listed as an owner in GSC property.
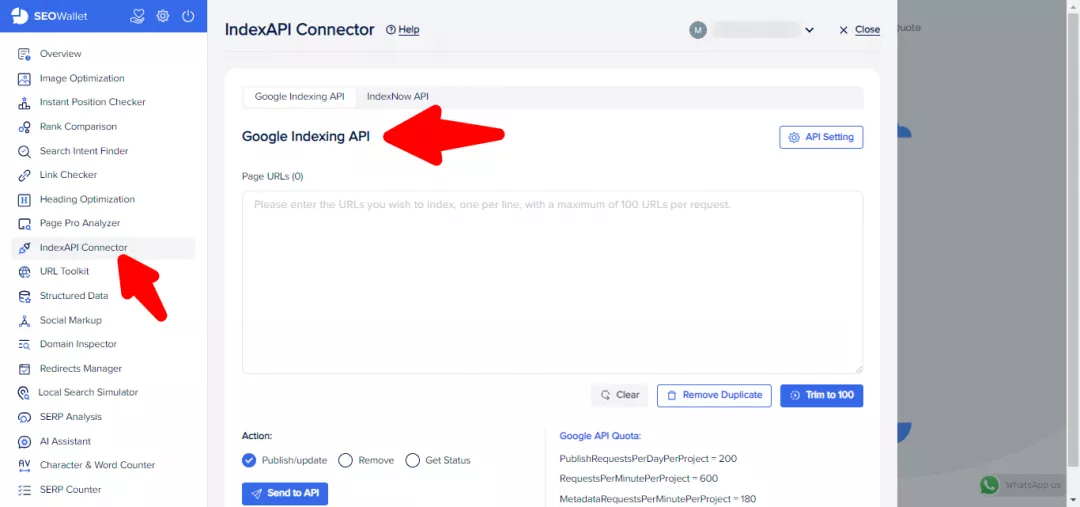
Step 5: Setting Up and Using SEOwallet Extension
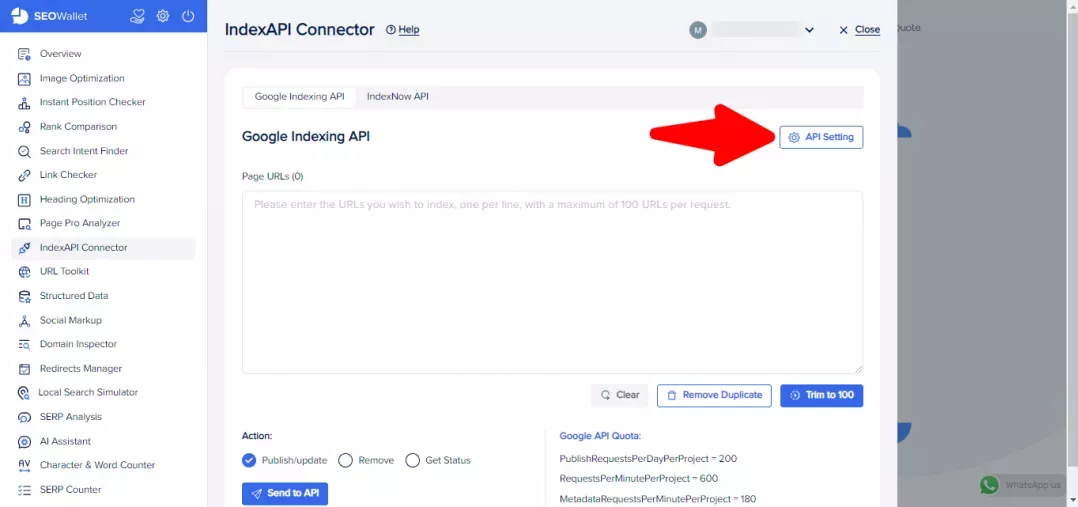
Now that you have everything ready, the next step is to open your SEOwallet extension and go to “API Setting”.
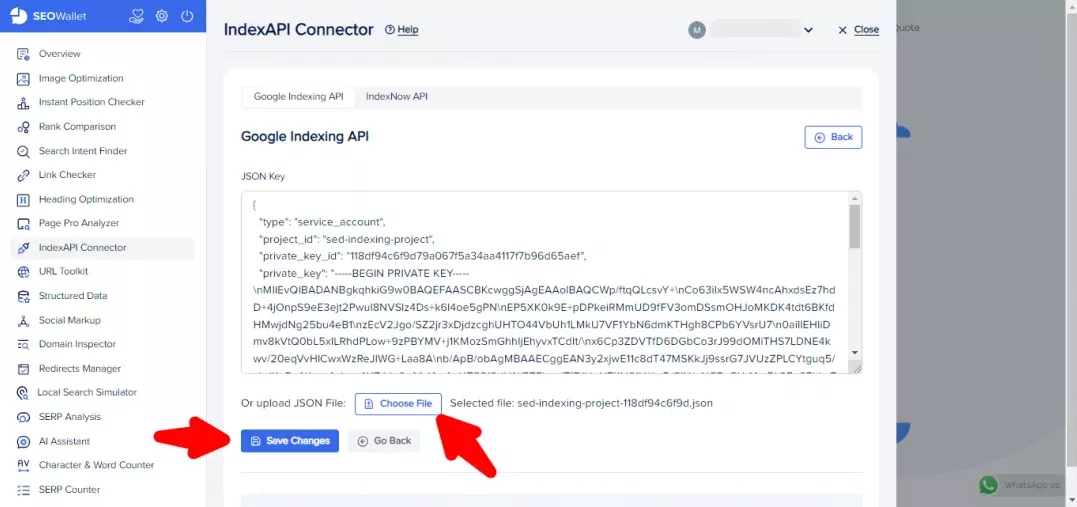
Just copy and paste your JSON key or select the option “Choose File” to upload it. Once it is uploaded, click on “Save Changes”.
Now you are ready to send URL requests.
Enter the desired URLs (one per line) and choose the 3 options below:
Publish/update: To publish or update a URL.
Remove: To remove a URL.
Get Status: To check the status of the last request you sent.
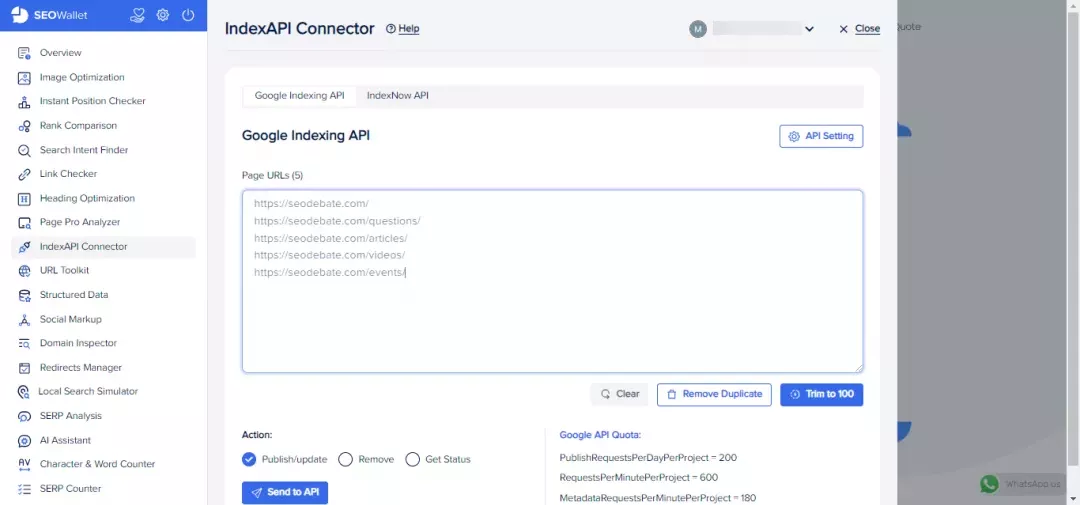
If there are more than 100 URLs in your request you can limit it to 100, by choosing the “Trim to 100” option. Also, you can remove the duplicates from your selection by choosing the “Remove Duplicate”. After choosing the options, click on “Send to API”.
Keep in mind you can send up to 100 URLs per request and up to 200 per day. If you want to send more requests, you can set up another JSON key for it.
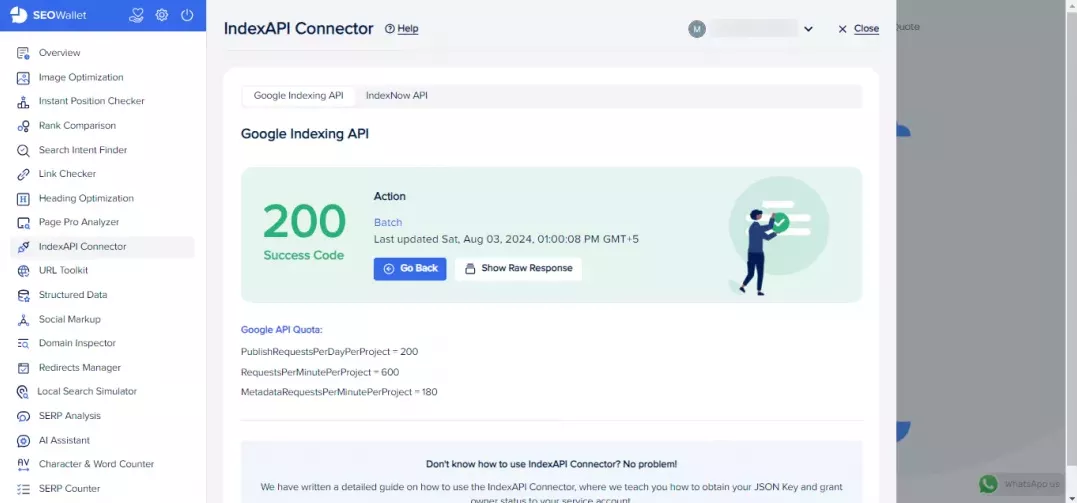
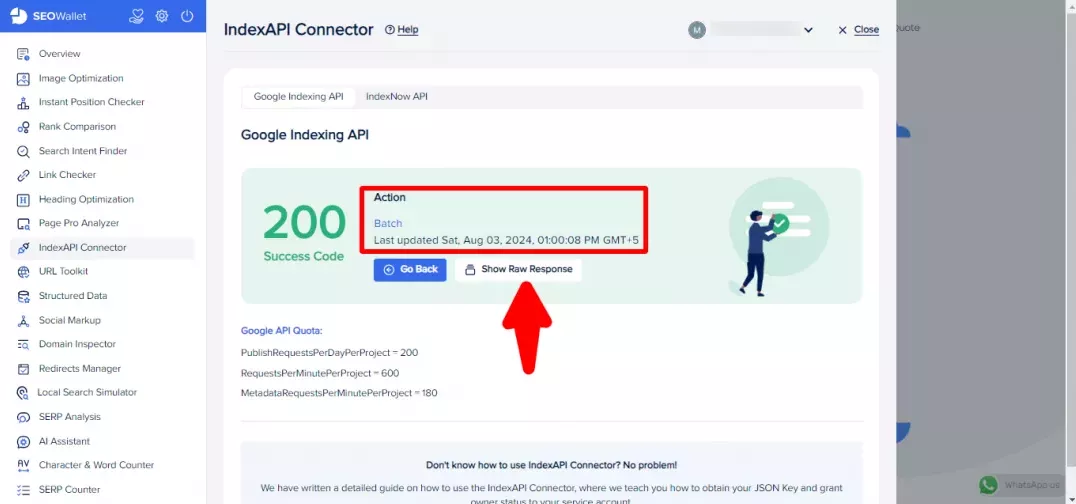
You can also check the status of your last request by choosing the “Get Status” option. Selecting “Show Raw Response” will give you even more details.
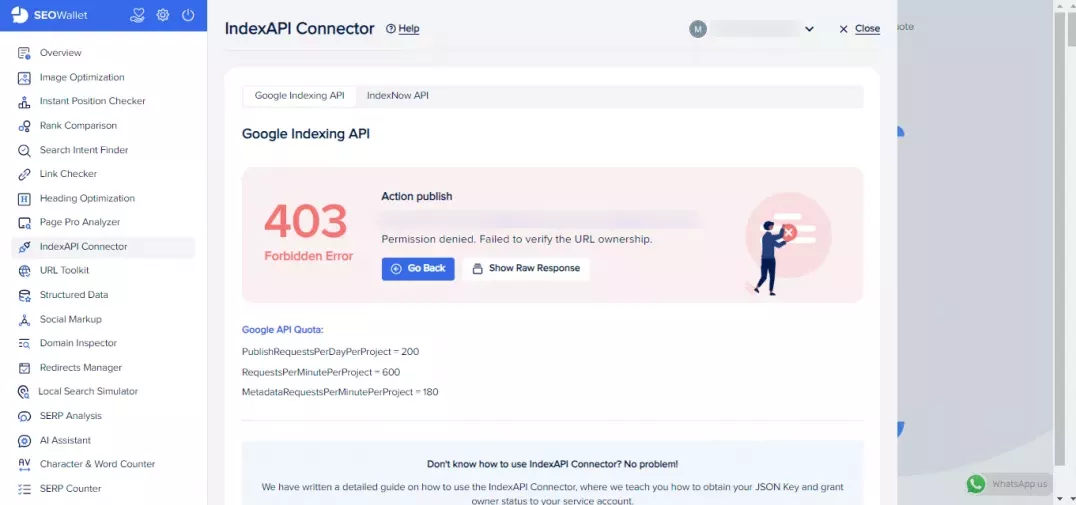
If you see the error message below, it means you do not have ownership rights for this URL.
Setting up the SEOwallet Chrome extension is quite easy. Within just a few steps, this is how you can take advantage of it to get your URLs instantly known by Google.
Frequently Asked Questions
How to set up SEOwallet Chrome Extension?
Setting up the SEOwallet Chrome extension is quite easy. Just click here to download and install it. Enable the extension and you are ready to use it.
What if I want to send more than 100 URL requests?
There is a limit of 100 URLs per request. If you want to send an indexing request for more than 100 URLs, you need to send another request. Keep in mind there is a limit of 200 URLs per day. If you want to send more requests you need to generate another JSON API key.
What is the meaning of a 403 error?
While sending a request if you experience a 403 error message, it indicates that you do not have URL ownership.
How can I check the status of my URL requests?
Use the “Get Status” option in the IndexAPI Connector. Selecting “Show Raw Response” will provide more details about your request.